(Update: I have a new, related post about the Best Git GUIs for Windows.)
I’ve been attracted to, and trying out, various distributed source control tools for the last two years, and have come to the conclusion that the most likely “winner” is Git. Git does a great many things right, good progress is being made in the few areas it is weak, and it has rapidly growing popularity. There are many web sites with extensive information about using Git, learning Git, Git integration, and more.
For new Oasis Digital projects, we will generally Git rather than SVN for source control. Here are instructions I wrote to help our teams get started. The contents here are 95% generic, but the references to me are, of course, Oasis-Digital-specific.
(For a general introduction to Git, consider this video at GitHub.)
GitHub
Although Git is a fully distributed source control system, it is very convenient to have a set of robust, central repositories. Oasis Digital’s repositories are hosted by GitHub:
http://github.com/
Github offers a useful set of online features to supplement what Git has built in and available locally. As of the spring of 2008, GitHub is certainly a work-in-progress, I’d characterize is as a “beta” level service. Nonetheless it is worthwhile and recommended. There is a lot to learn from the “guides” published here also:
http://github.com/guides
Install and Configure msysGit on Windows
I assume here that you are using Windows, although Git works very well (better, actually) on Linux or Mac. As I write this, the best Windows Git package is msysgit, available here:
http://code.google.com/p/msysgit/
Make sure to follow the download instructions labeled “If you only want to use Git”. As I write this the download is Git-1.5.5-preview20080413.exe, but get the current version available as you read this instead, not that specific version.
Install by running the EXE installer. Accept the default install directory. When you get to the PATH setting screen, I recommend the “Use Git Bash only” setting, because it avoid any risk of PATH conflicts.
By default, Git will be configured to translate text files between Windows CRLFs (in your working copy) and Unix LFs (in repositories). This setting is fine if you like to use an editor on Windows that insists on Windows CRLFs. I generally use an editor that is equally happy to use Unix LFs, so I sometimes use Git in the other (non-translating) mode.
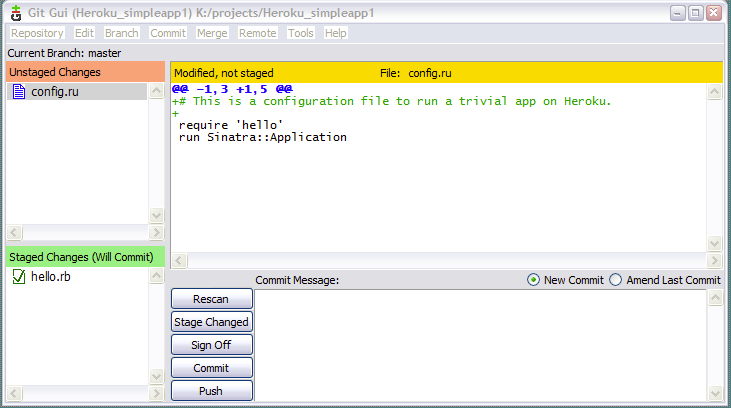
msysgit includes both the git command line, and a usable GUI. The GUI is not on par with more mature products, but it is helpful and good enough for users who are allergic to the command line.
Create your SSH Key
The first step in using Git is to create your SSH Key. This will be used to secure communications between your machine and other machines, and to identify your source code changes. (If you already have an SSH key for other reasons, you can use it here, there is nothing Git-specific about this.)
In Windows Explorer, pick any convenient directory, right-click, and choose “Git Bash Here”.


Then type this command:
ssh-keygen -C "username@email.com" -t rsa
(with your own email address, of course)
Accept the default key file location. When prompted for a passphrase, make one up and enter it. If you feel confident that your own machine is secure, you can use a blank passphrase, for more convenience and less security. Note where it told you it stored the file. On the machine I tested with, it was stored in “C:\Documents and Settings\Kyle\.ssh\”
Open the file id_rsa.pub with a text editor. The text in there is your “public SSH key”. You will need it to set up your GitHub account, in the next section.
Beware of $HOME trouble: a reader reported a tricky failure mode in which some other software he installed had set up a HOME or HOME_PATH environment variable pointing in to that application instead of to your real home (“Documents and Settings”) directory.
More details on the key process are available here:
http://github.com/guides/providing-your-ssh-key
Set up your GitHub account
Go to http://github.com/ and sign up for a free account. In the sample here I signed up with a made-up alter-ego, harry@kylecordes.com. Use your own, real email address of course.

Don’t worry that GitHub describes the free account as for “open source” work; I will later add you as a collaborator to my paid (and therefore private, non-open-source) projects. Make sure to copy-paste in your SSH public key that you created earlier.
Once you have set up your github account, email your github username (not your password) to me, so I can add you to the relevant project(s). (Reminder – send to me only if you are working on an Oasis Digital project! If you are using this page as generic Git instructions, send the information to your project leader instead!)
Once I have added you as a collaborator to the relevant project and sent back its URL, you can navigate to the URL, which will look like this:
https://github.com/kylecordes/PROJECTNAME/tree/master
On that page, click the “fork” button to create your own workspace for the project. This will take you to your own page for the project, something like this:
https://github.com/YOURNAME/PROJECTNAME/tree/master

Now you can clone this project to your own machine, as discussed below.
Getting Started Locally
First, use the “Git Bash Here” feature described above, to get a command prompt. Tell Git about your name and email address:
git config --global user.email Your.Email@domain.com

git config --global user.name "Your Real Name"
Then you are ready to proceed with getting into a project. Copy the “Clone URL” from a github project page. Make a new directory on your machine, to become your working directory. There are two approaches to which project to clone.
- Clone from your own fork repo. This will make it trivial to push your changes up, but require one more command to get upstream changes.
- Clone from the upstream (my) repo. This will make it trivial to get change, but require one more command to be able to push changes, because you can’t push to another Github users’ repo.
I assume later in these instructions that you chose #1.
Next, get your local clone by clicking, or by typing.
Approach 1: GUI
In Windows Explorer, Right click the working directory and choose “Git GUI Here”.
Choose “Clone Existing Repository” in the dialog that comes up:

Paste the URL that you copied above from GitHub. Note that in the screenshot I show it as if you clone your repo, while I think it’s slightly easier overall to clone the upstream repo. Thus it really should show git@githib.com:kylecordes/sample1.git instead.
Note that your browser might add an erroneous mailto: to the URL, which you must remove – Git URLs do not start with “mailto”. Enter the directory where you want your working copy:

Make sure to use real, reasonable values. For example, you are not working “sample1” and you probably don’t keep your working projects in a directory named “GitStuff”, so put in a directory that makes sense for the project you are working on. Also, put your working copy in a place where you can effectively work in it; for example the working copy for a web project should usually be under the webroot of your local development web server.
Click Clone. You will be prompted for your passphrase if you used one. In a few minutes the Clone will finish, and you have the project available on your machine. I’ve had sporadic problems with this process hanging (growing pains at GitHub are the likely cause), so if you don’t see progress for a few minutes, stop it and start over.
Approach 2: Command Line
I find this easier. In Windows Explorer, right-click on the working directory you want and choose “Gui Bash Here”. Then enter a command like this:
git clone repoURL
Git might prompt you about an SSH key, the first time you do this with github (or any other new server). Answer “yes”.
It’s worth pointing out here, if you didn’t already understand from the various Git web sites, that Git is a distributed source control system. It will pull down the whole project history, so you can browse history and even commit changes without online access. Thus Git works very well if you have an intermittent or poor network connection.
Work Flow
As with all source control, work in the directory where you use source control. Do not copy files back and forth between here and some other working directory, that is a path to endless merge and update problems.
Once you have checked out the software, here is a summary of your work flow. For more details, please read the copies Git documentation online. I suggest reading both the official Git material, as well as other sites and articles about Git.
Getting Changes
Get changes from others with “git pull” (or using the GUI). By default this will pull from the repo from which you cloned, so if you cloned the upstream repo, that will get other peoples’ changes.
If you cloned from your own Github repo, you’ll need to use something like this:
git remote add upstream git@github.com:kylecordes/sample1.git

git pull kyle upstream
Sending Changes
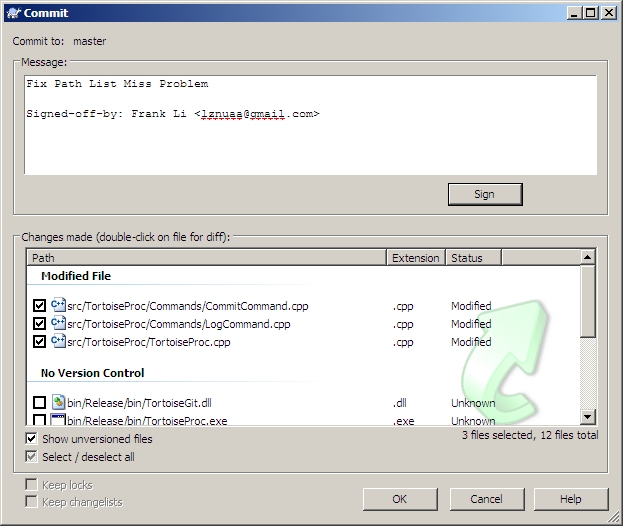
Commit your changes locally with “git commit” (or using the GUI). Remember that Git generally wants you to explicitly say which files’ changes to include (“git add”), so make sure you read and understand enough about Git to do this properly; it is only a few commands or clicks in the GUI. The usual caveat applies, to only commit actual source files, not generated files or temp files.
Push your changes up to your GitHub repository with “git push”. This step will make it so others on your project can see your changes. Do this at least once per day, and ideally more often as you collaborate. Assuming that you cloned from the upstream repo, you’ll need to set up a reference to your own Github repo (the one you can push to), with something like this:
git remote add harry git@github.com:harrycordes/odtimetracker.git
As usual, use reasonable names and relevant URLs, not my sample names and URLs. Once you’ve added the remote reference, pushing is easy:
git push harry master
When you have a set of changes (one or more commits) that you think are ready to go in to the main-line of the project, use Github to issue a “pull request”. Your project lead (me, typically, at Oasis Digital) will review your commits and either pull them in to the main-line, or send feedback about changes needed before they can be pulled in.
A key thing to understand about Git is that it makes branching extremely easy and fast, so that very convenient to use branches. If you are accustomed to other source control systems where branching is a big, painful thing, it will be very different for you in Git. Once you learn to use branches, you’ll sometimes push up a branch you are working on instead of master.
I’ve only scratched the surface in this introduction. You now have Git up and running with project code in it, so pick up a Git tutorial or reference (such as the screencast videos at GitCasts) and start learning.
To Learn More
I heartily recommend the “Illustrated Guide to Git on Windows“. It doesn’t yet cover GitHub, but does cover many more details of using Git itself.
Also, a bit of Git can be very useful even in a project that uses SVN, especially when you need to rearrange a bunch of files in SVN.
Update: In a newer post, I list several other Git GUIs for Windows.

