
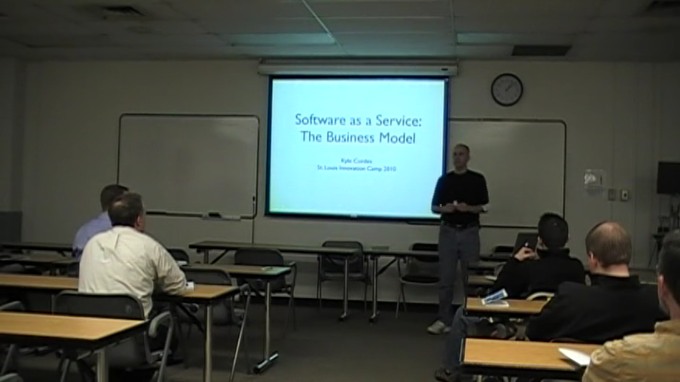
On Feb. 27 at St. Louis Innovation Camp 2010, I gave a talk on the SaaS business model. I posted the slides, handout, audio, and transcript soon thereafter. Here is the 44-minute video the talk, conveniently on YouTube:
But until I revisited this page in 2020, the video situation was much more complex. It took three months (back in 2010) to post.
Warning: Sausage-making Discussion Below
The following has nothing to do with the content of the video.
This is an x.264 video, shown here initially with a Flash-only player (FV WordPress Flowplayer). Later I’ll replace this Flash-only widget with one that offers HTML5 video (for iPad use, in particular), when I find one that works sufficiently well.
That’s the easy part, though. Getting this video to you here was an adventure, and not in a good way. Three recordings were made of the talk:
- We hired a professional videographer to record the talk. When I say professional, I mean it only in the most literal way, i.e. the videographer charged money. They showed up with a nice camera and a wireless lapel mic… but somehow produced a broken video recording (the first 10-15 minutes were intermittent video noise). In addition, the mic gain was turned up way too high and thus the audio is awful.
- Dave Blankenship recorded the talk on his consumer camcorder; he was not paid for this, yet he did a much better job. This video is usable all the way through, but arrived in an oddball format produced mostly by some models of JVC camcorders. The audio was not so hot, because he used the mic built in to the camcorder from the back of the room.
- I recorded the audio using a $5 microphone plugged in to an iPod Nano, sitting on a table at the front of the room. It’s a bit noisy, but with a few minutes of work with Audacity (Noise Removal and Normalization), the results are much better than either video attempt.
Armed with this, I set about to somehow combine the video from #2 with the audio from #3. I send emails describing this mess to several videographers I found on Craigslist. Most of them didn’t reply at all. I finally got a cost estimate from one, of many hundreds of dollars or more, and not much assurance of results.
Now I’m willing to spend some money to get good results, but spending it without confidence of results is less appealing; so I set about trying myself instead.
First, I cleaned the audio in Audacity as mentioned above.
Second, I watched the video and listened to the audio a few times, to get the approximate starting timestamp in each one of the moment the talk actually started; each recording had a different amount of lead-in time
Third, I grabbed ffmpeg, the swiss army knife of command line video and audio processing. After reading a dozen web pages of ffmpeg advice, and a number of experiments (with short -t settings, to quickly see how well it works without waiting to transcode the whole thing), I ended up with this command to produce the encoded video:
ffmpeg -y -ss 40.0 -i Recording-3-audio-only-clean.wav -ss 95 -i Recording-2-video-ok-audio-bad.mod -shortest -t 18000 -vcodec libx264 -vpre normal -b 700k -threads 2 Cordes-2010-SaaS.m4v
I then noticed that the MacPorts installation of ffmpeg omits the important qt-faststart tool, and found this helpful version of qt-faststart and used it instead, on my Mac; later I switched to a Linux machine with an ffmpeg install including qt-faststart. Without the faststart step, the metadata in the m4v file is arranged in a way that prevent progressive/streaming play-while-downloading.
The results are good but not great:
- The video has some motion/interlace artifacts; these were present in the original recording, and I’m not aware offhand of what to do about them
- The video camera used rectangular pixels; the pixel aspect ratio is 3:2 while it is intended for display at 16:9. I wasn’t able (at least in 20 minutes of learning and experimentation) to get the 16:9 output working correctly, so if you grab the underlying m4v file you can see the aspect ratio a bit off in the shape of the clock on the wall, for example.
- The audio-video sync is adequate (and plenty good enough to follow along) but not perfect. Clearly using the audio track on a video recording is much better than putting them together in post-processing.
- The audio is not as good as if I used a lav or headset mic, though I think it’s quite remarkably good for a $5 mic plugged in to iPod.
- I’ve no idea if ffmpeg complies with any of the relevant copyrights/patents/whatever in video production, though it seems hopefully safe to use for a one-off non-commercial video like this. (Normally I use Apple’s iMovie for my videos, and I assume Apple has taken care of such things.)
A few morals of this story:
- Get some powerful tools, and learn how to use them.
- Be willing to pay for professional work, but be skeptical. Just because you pay, doesn’t mean it will be quality work.
- Have a plan B. If I had assumed that at least one of the two videos would get decent audio, and skipped my own audio recording, I’d not have been able to deliver the acceptable audio here. If Dave had assumed that my professional videographer would produce results, and turned off his camera, we’d have no video here at all.